Human in the Loop for Make.com Automations
EnforcedFlow’s Human in the Loop is targeted towards generative AI workflows. This extension lets a human review automatically generated output before continuing the process to ensure accuracy, compliance, and accountability in automated workflows.
For example, take a Make scenario that generates a personalized article using OpenAI. With Human in The Loop, a human can review to make sure the content is correct or fine-tune it before publishing to WordPress.

How it works
Section titled “How it works”To setup a workflow similar to above leveraging human in the loop extension you will need to setup two scenarios. One to generate the content and send it for approval, another one to handle the approved content and take the next action. It’s straightforward to setup.
Getting started
Section titled “Getting started”Scenario 1: Generate content and send for human review
Section titled “Scenario 1: Generate content and send for human review”This first scenario will generate content using AI and create a review task for a human to approve or reject.
Scenario 1 Overview
Section titled “Scenario 1 Overview”Here’s what the complete first scenario looks like:
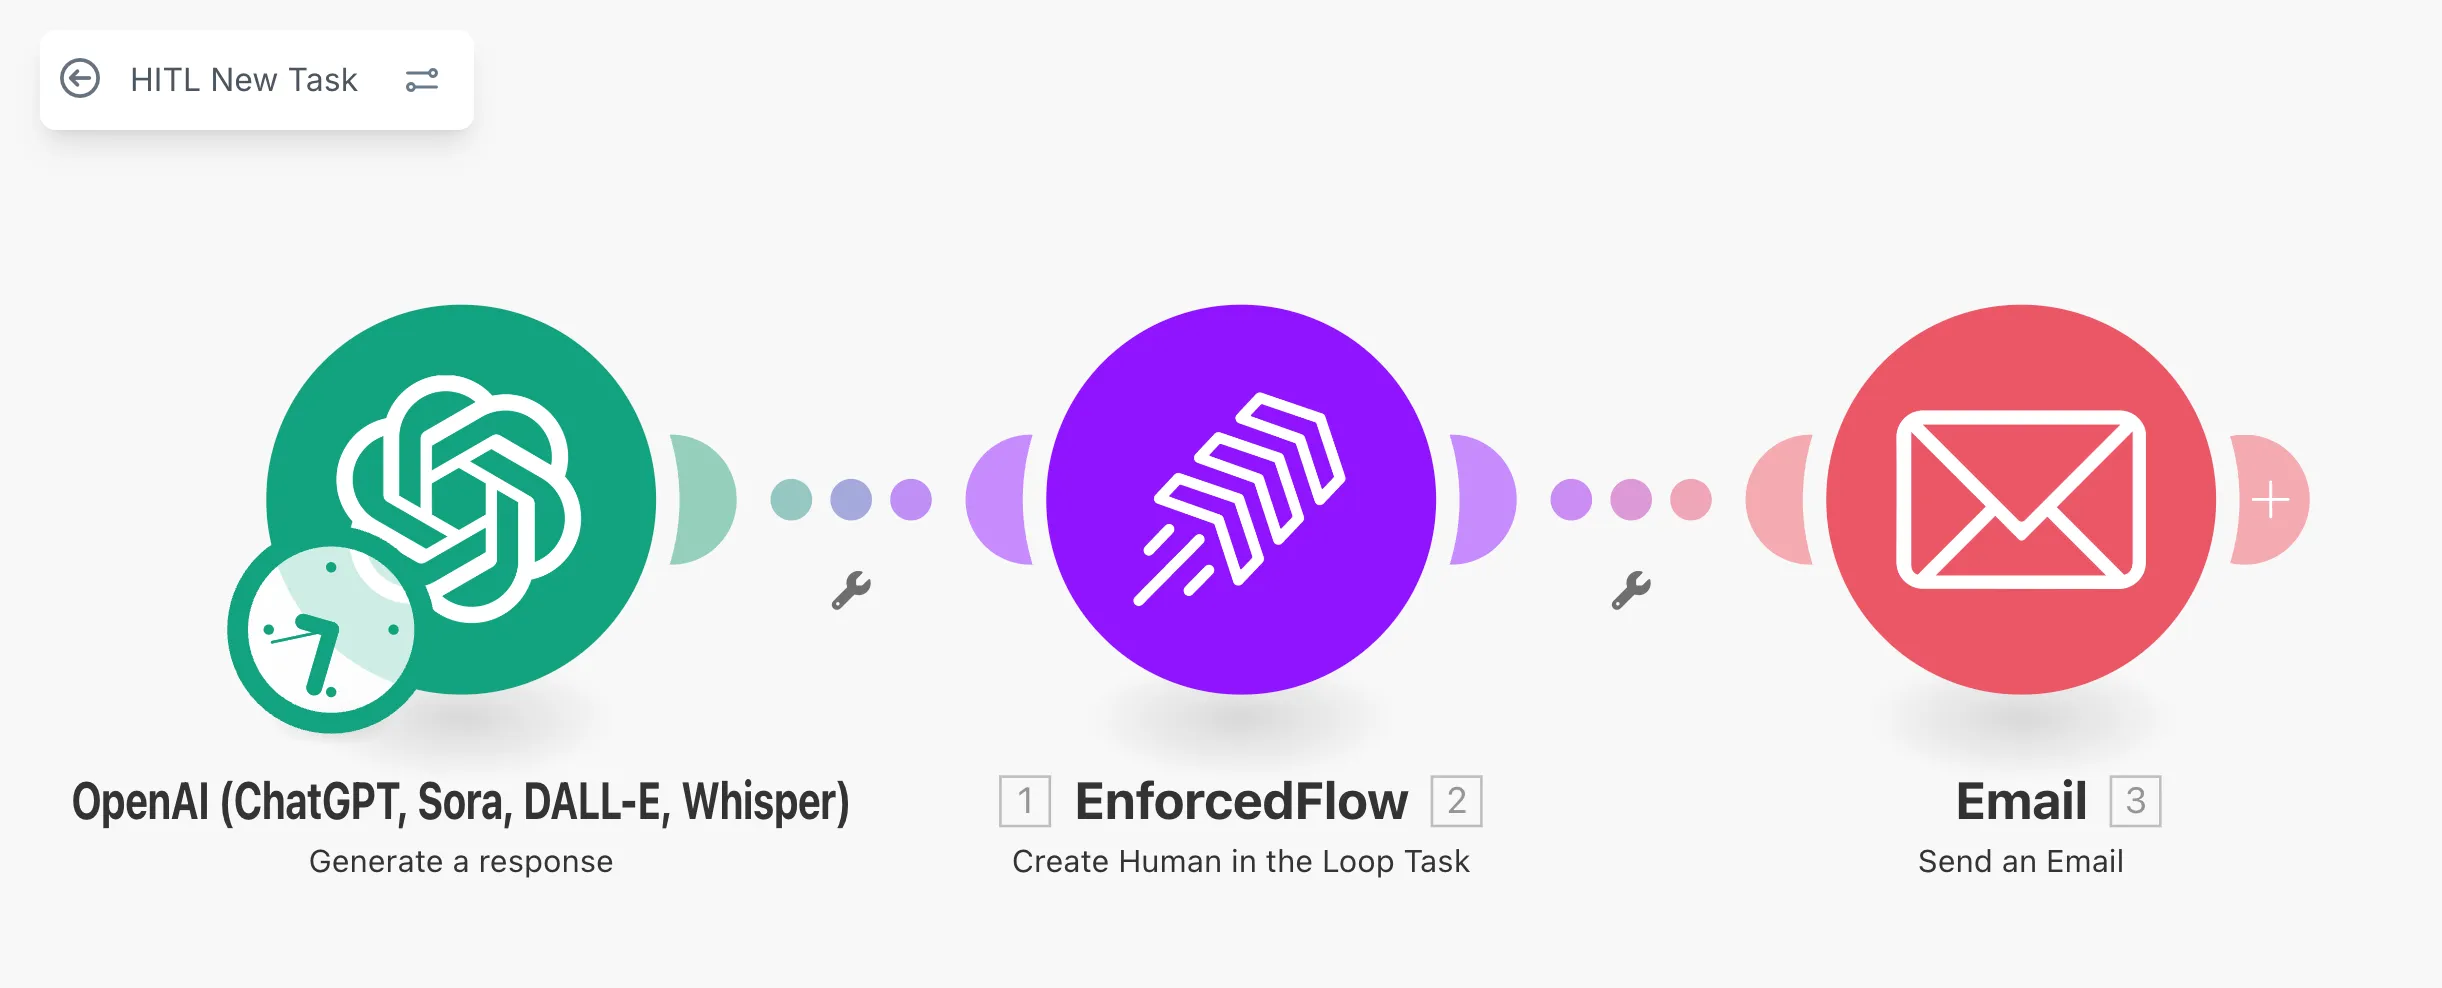
- OpenAI generates content based on your prompt
- EnforcedFlow creates a review task with that content
- Email sends the review URL to the reviewer
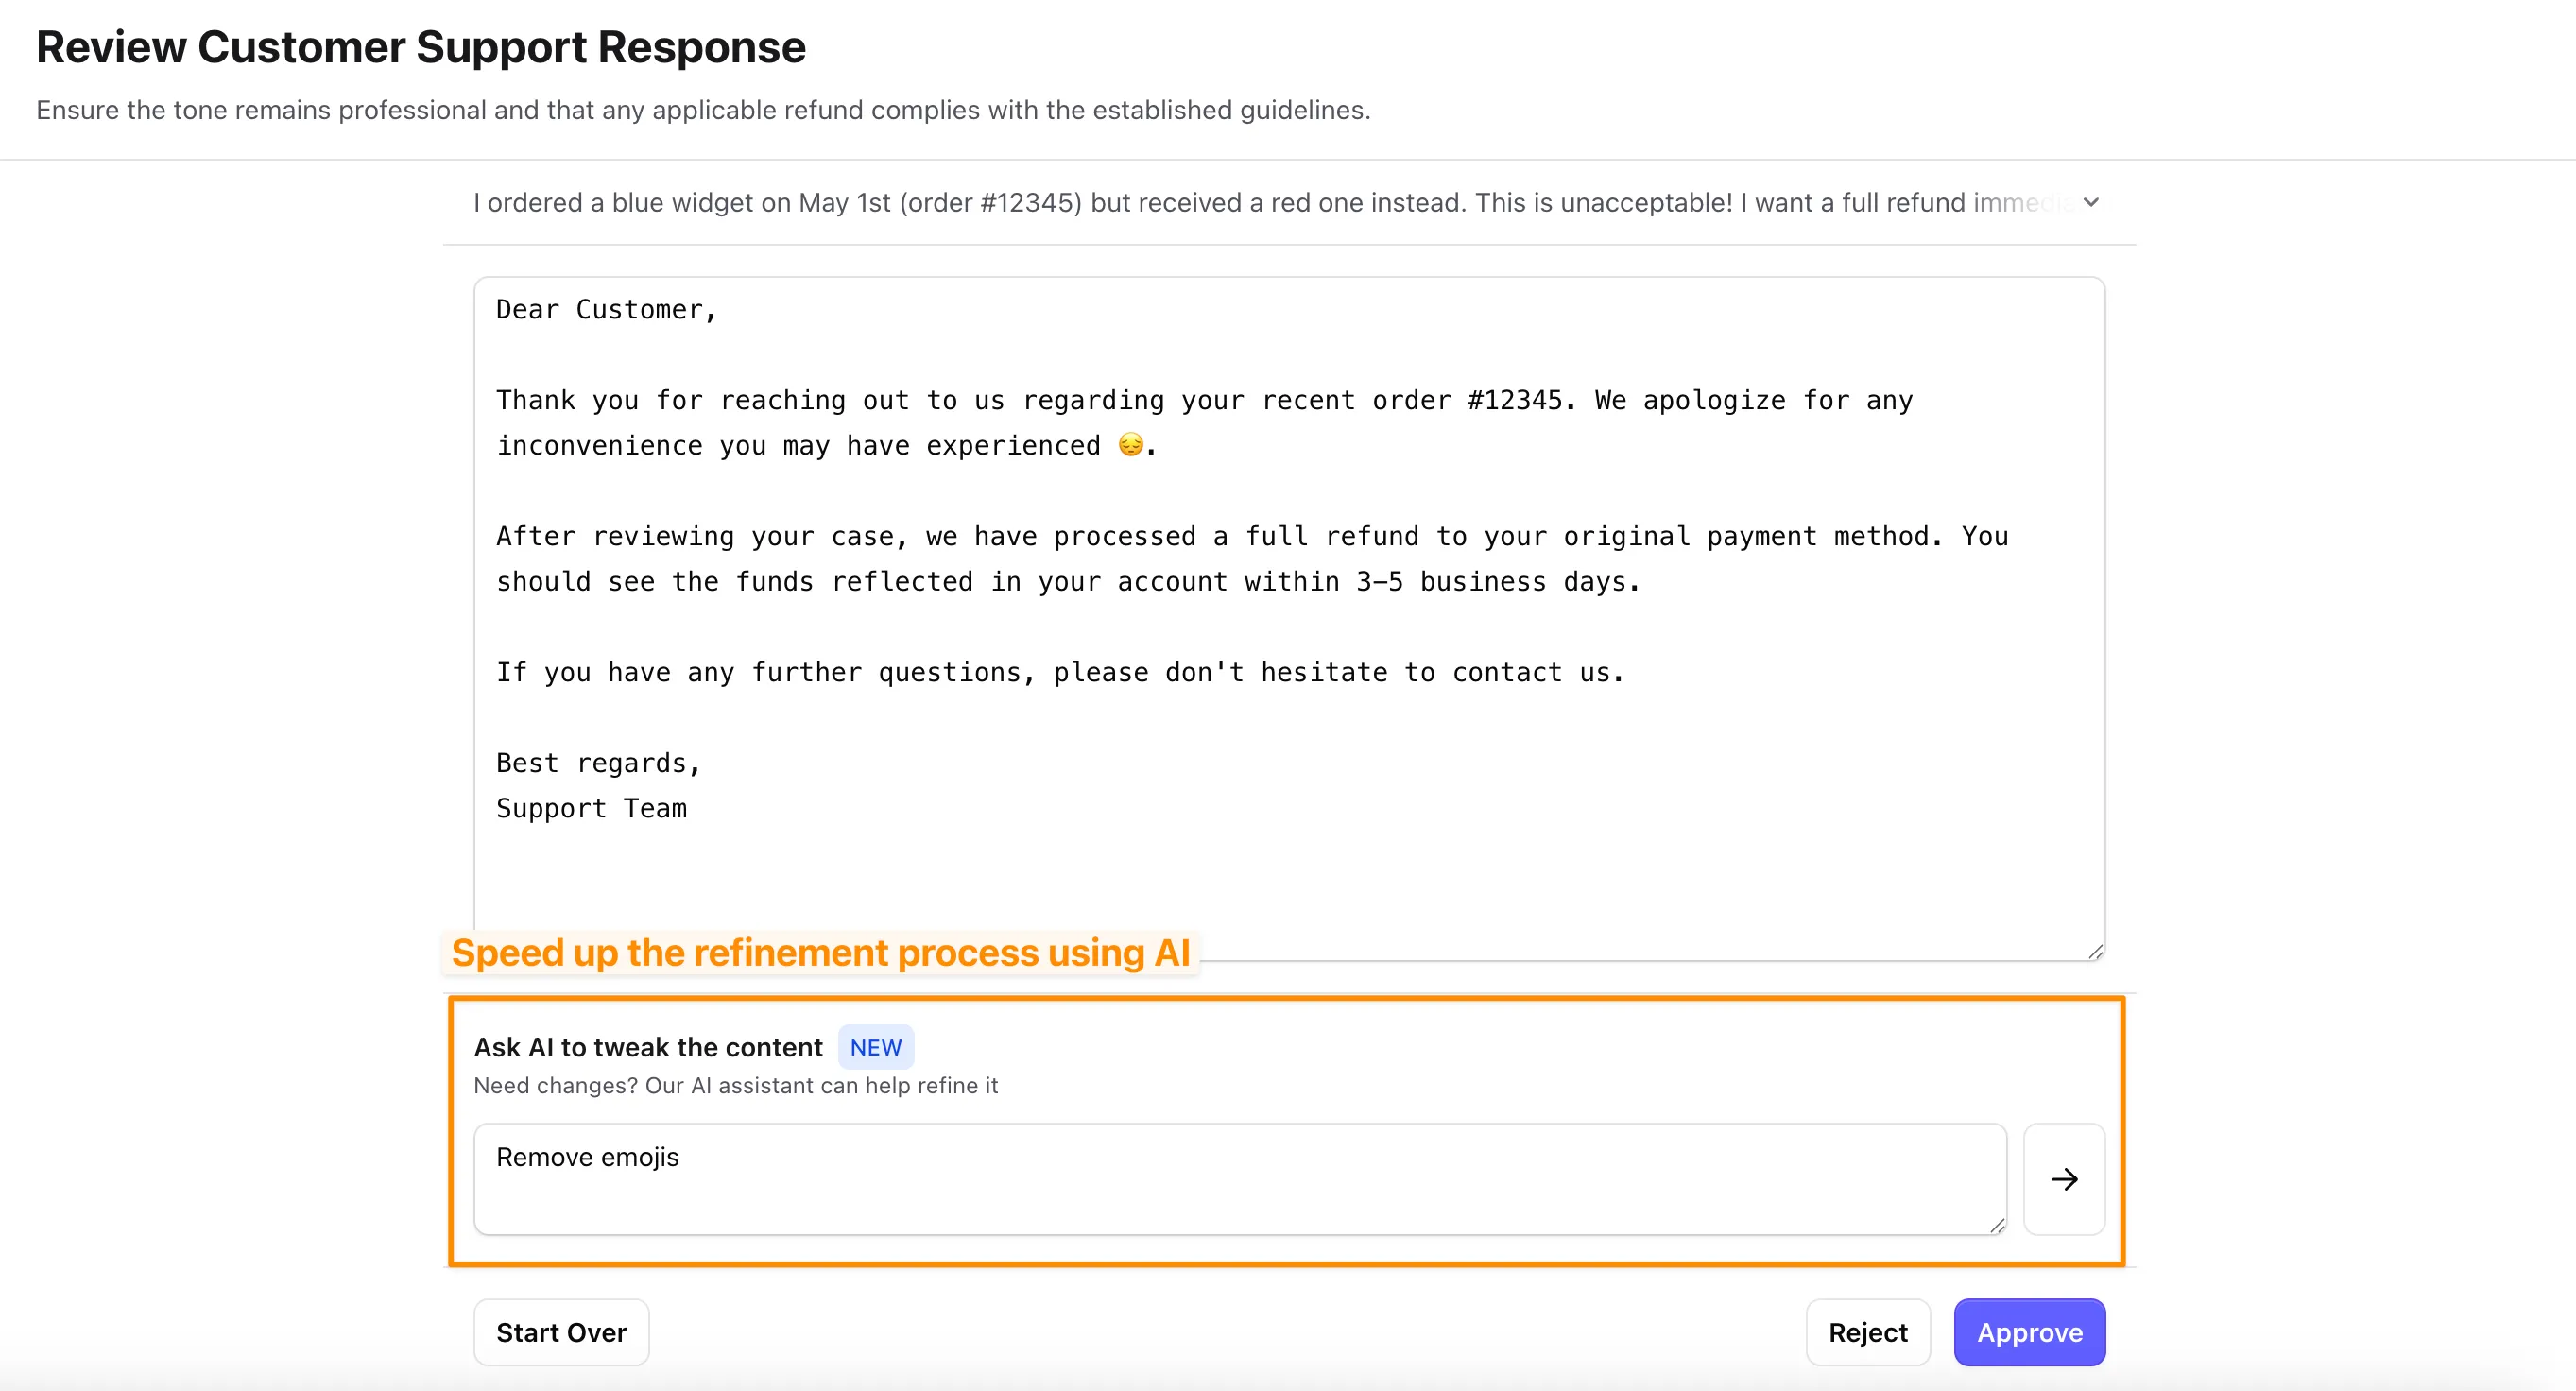
When the reviewer visits the URL, they’ll see an editable interface where they can modify the content and approve or reject it.
Step 1: Add a module to generate content
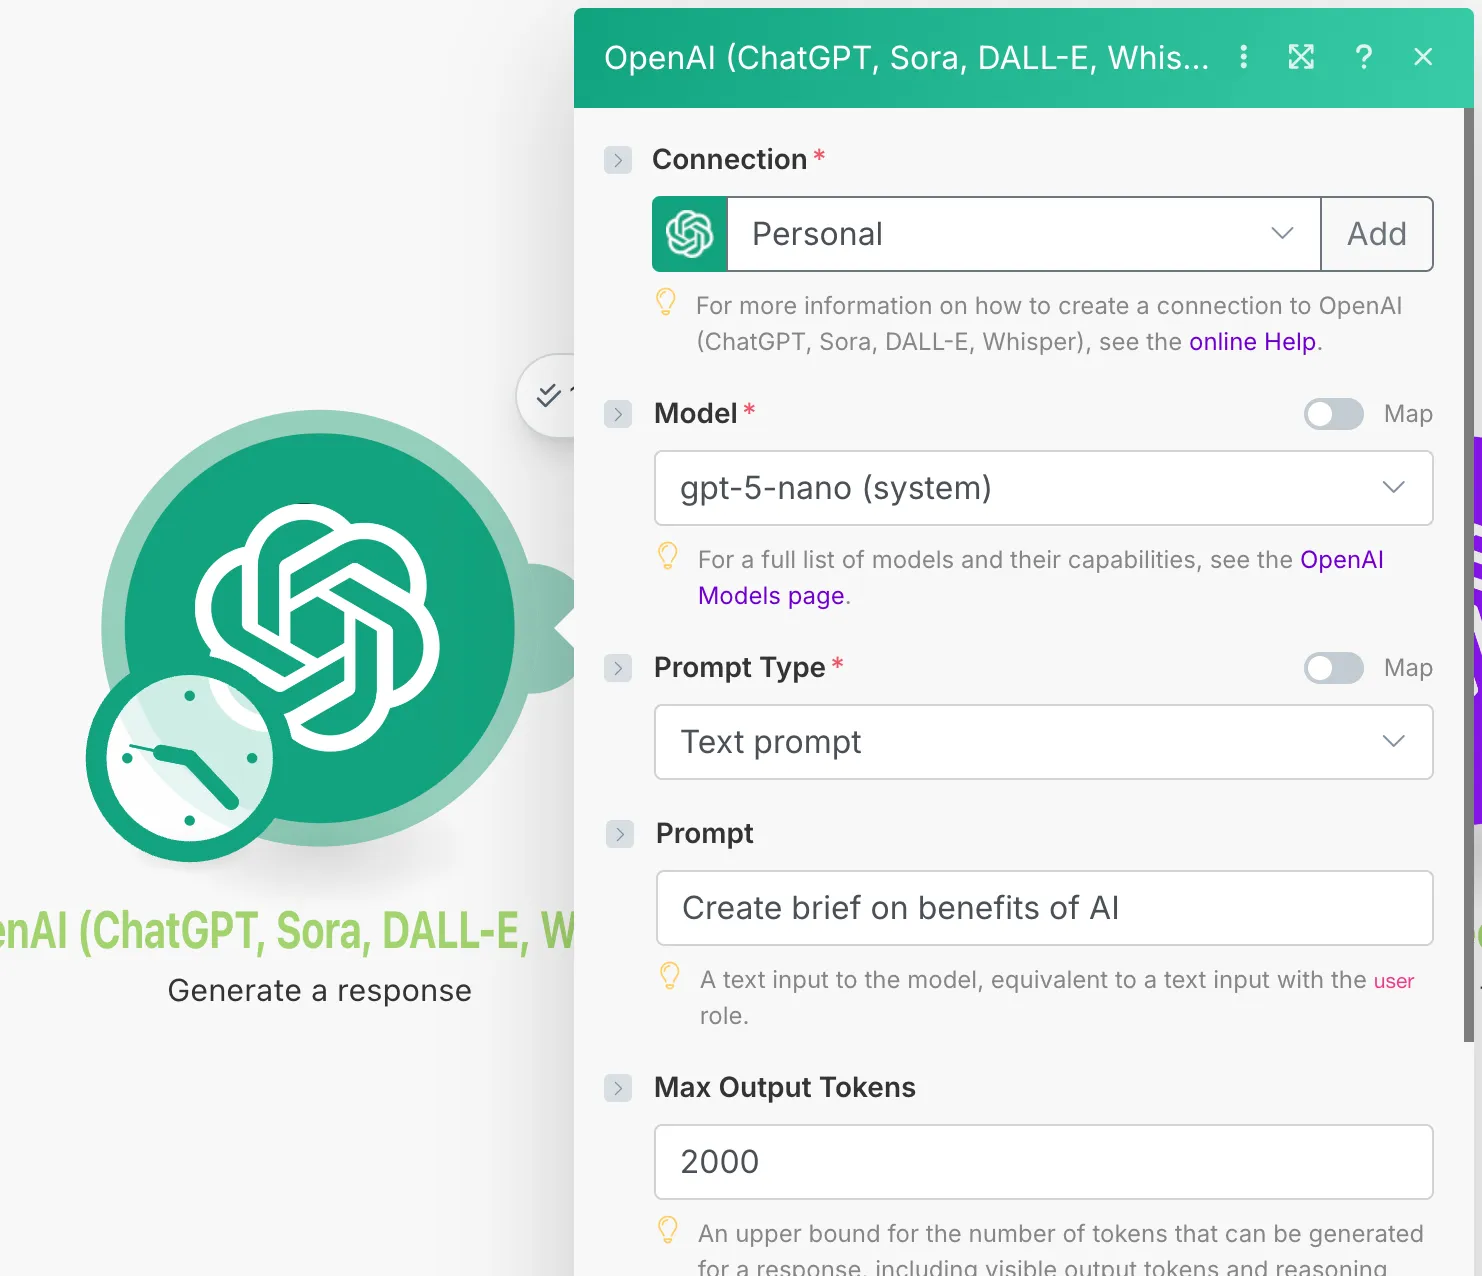
Section titled “Step 1: Add a module to generate content”Start by adding a module that generates the content you want reviewed. In this example, we’re using OpenAI to generate content.
Configure the module with your prompt and settings. The output from this module will be sent to the human reviewer.
Step 2: Add the “Create Human in the Loop Task” module
Section titled “Step 2: Add the “Create Human in the Loop Task” module”Search for EnforcedFlow in the module directory and select Create Human in the Loop Task as the action.
This module will create a review task and return a unique URL that you can share with your reviewer.

Step 3: Connect to EnforcedFlow
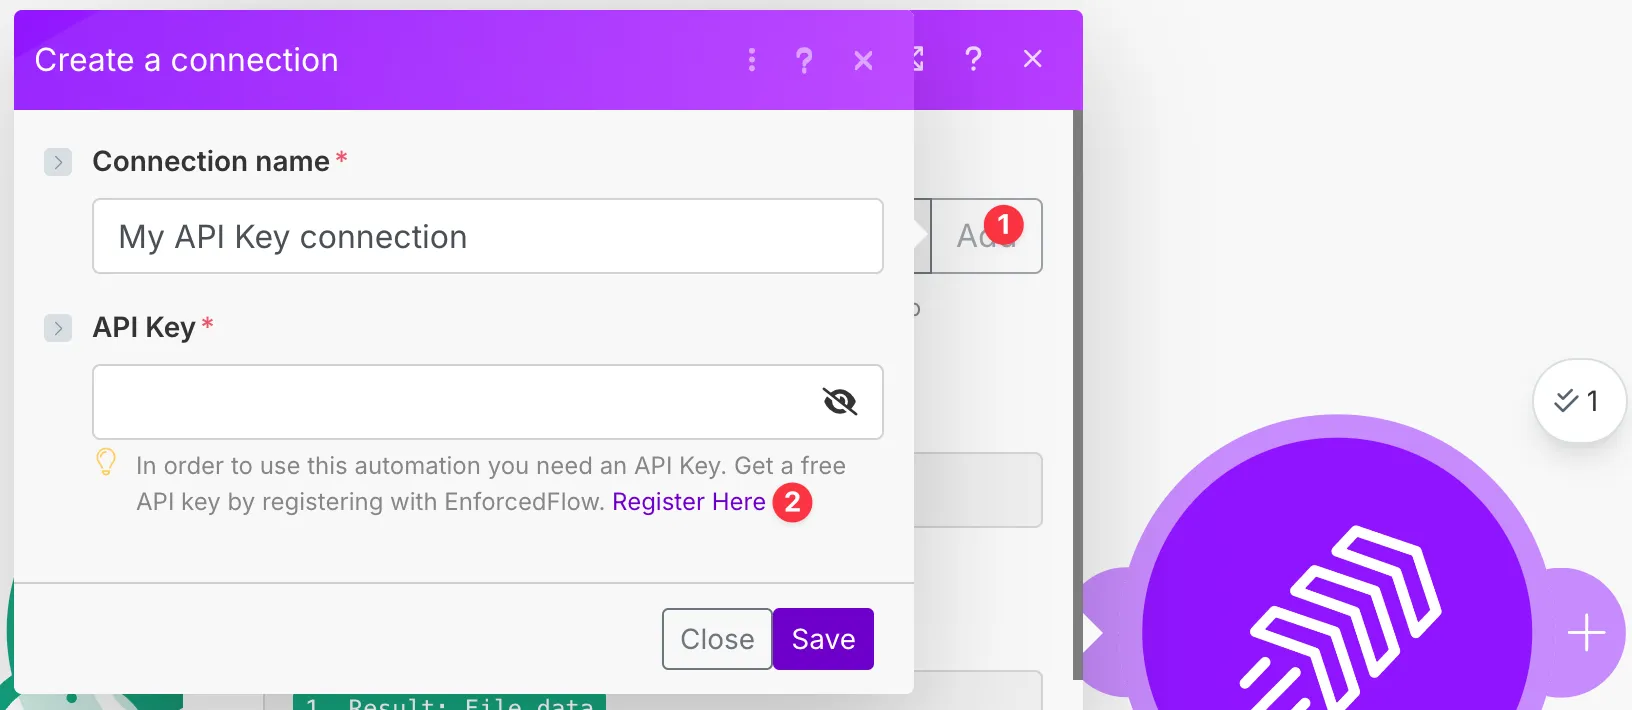
Section titled “Step 3: Connect to EnforcedFlow”Before you can use EnforcedFlow modules, you need to create a connection.
- Click Add to create a new connection
- Enter a connection name
- Enter your EnforcedFlow API Key (Register to get your free API key)
- Click Save
Step 4: Configure the review task
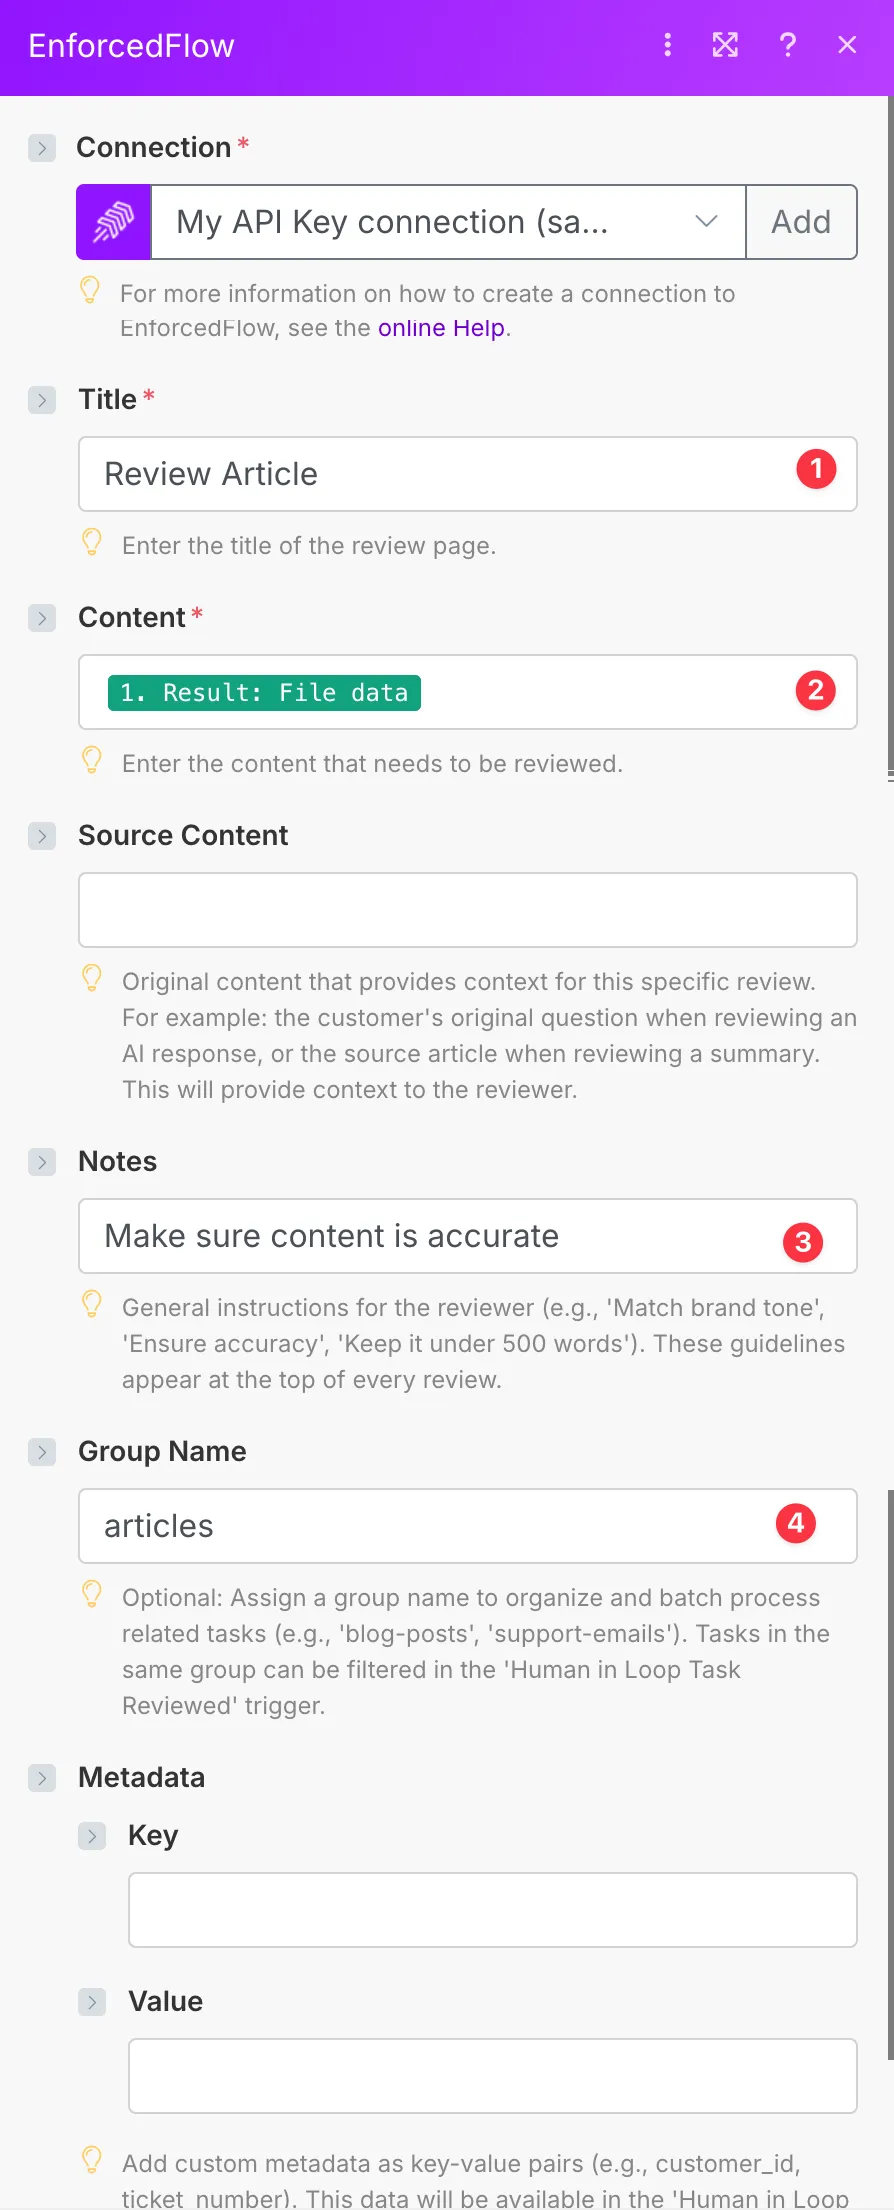
Section titled “Step 4: Configure the review task”The configuration options for the Human in Loop task are:
- Connection: Select the EnforcedFlow connection you created earlier
- Title (Required): The title displayed at the top of the review page
- Content (Required): The actual content that needs to be reviewed and potentially edited. Map this to the output from your AI module (e.g., OpenAI’s generated text)
- Source Content (Optional): Contextual information that helps the reviewer understand the background. For example, the original prompt or source material
- Notes (Optional): General instructions or guidelines for the reviewer (e.g., “Make sure content is accurate”, “Match our brand tone”)
- Group Name (Optional): A unique identifier to organize different types of review tasks. Use this when you have multiple review workflows and want to ensure each type only triggers its specific follow-up scenario
- Metadata (Optional): Custom key-value pairs that you want to pass through the workflow but don’t need to show to the reviewer. This data will be returned in the “Human in Loop Task Reviewed” webhook
The module will output a Review URL that you can send to your reviewer.
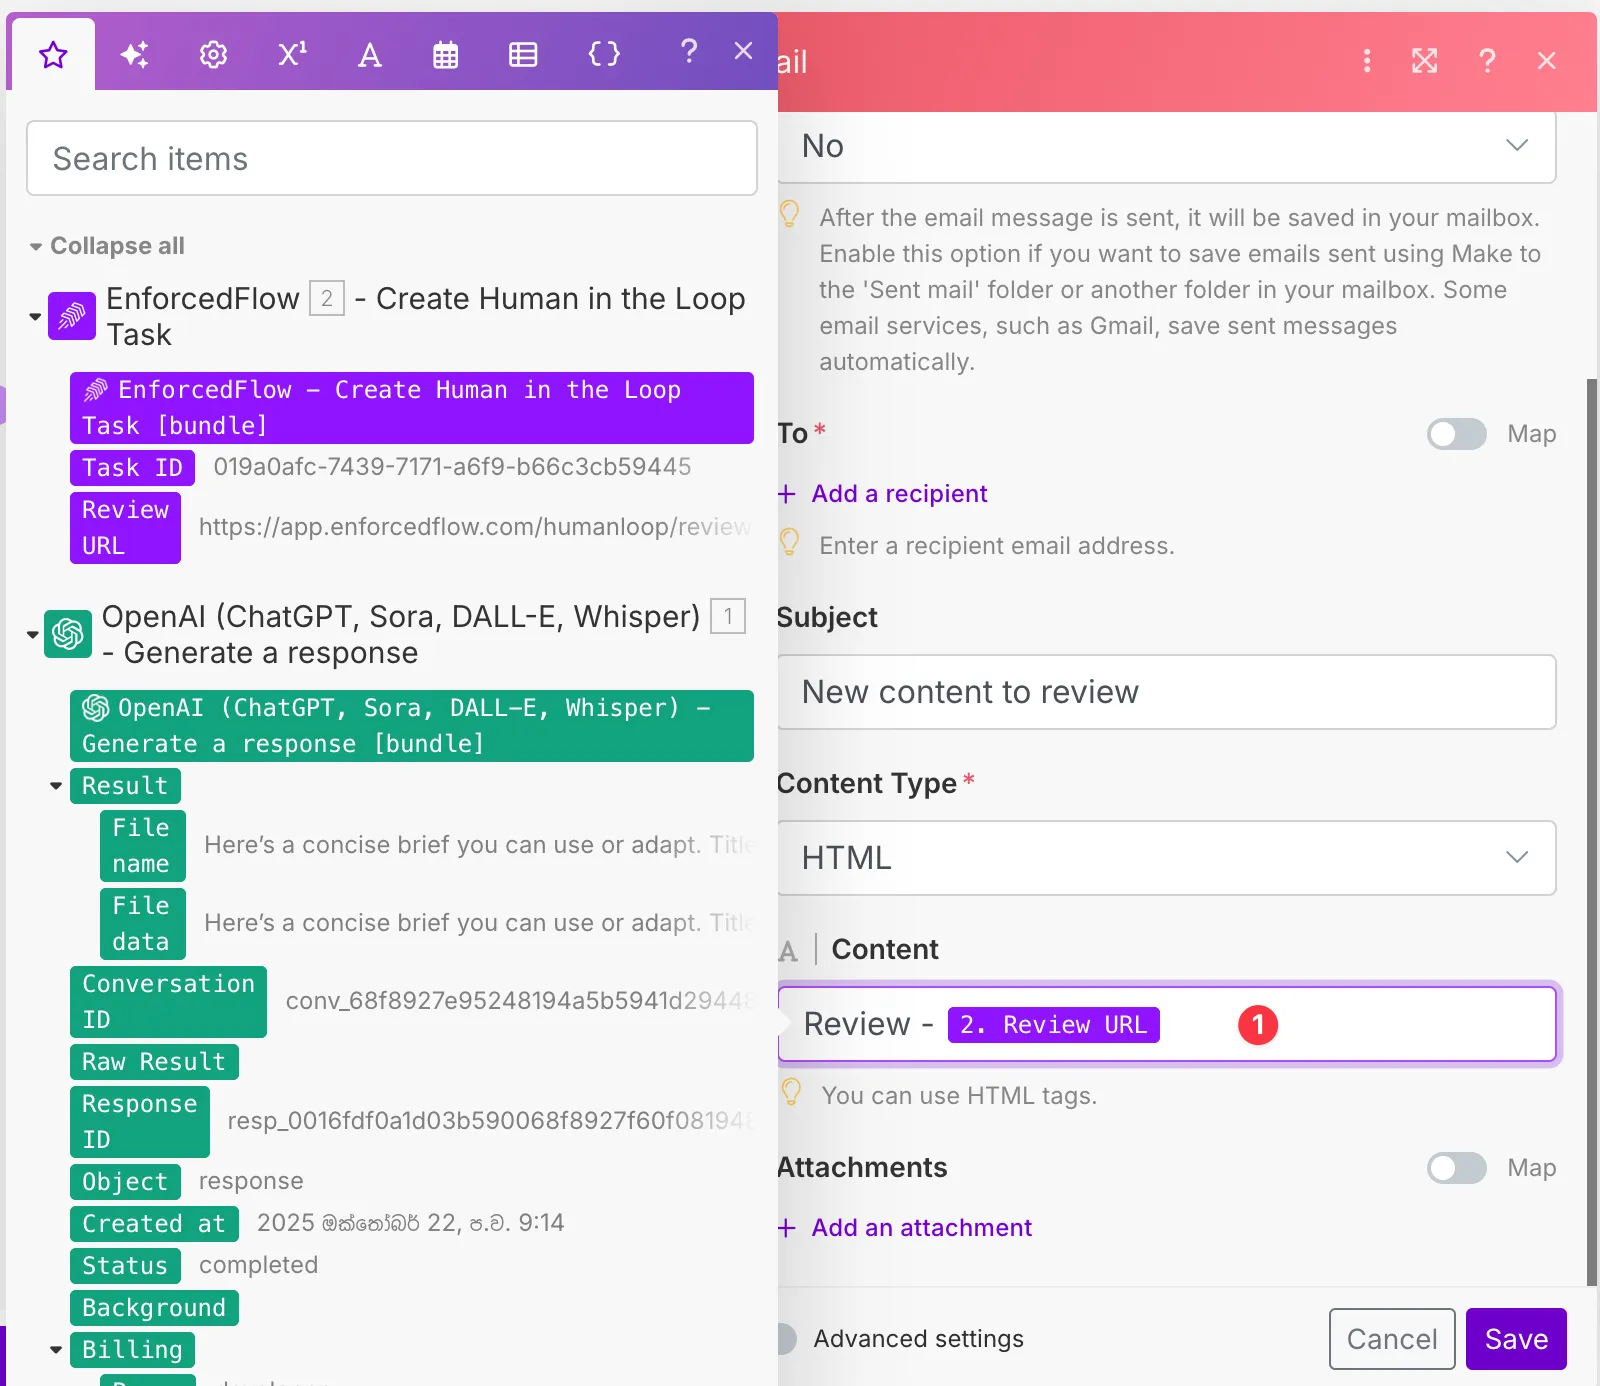
Step 5: Send the review URL to your reviewer
Section titled “Step 5: Send the review URL to your reviewer”Add an Email module (or any other notification method like Slack) to send the review URL to your reviewer.
- Map the Review URL from the EnforcedFlow module output to the email content
- Configure the recipient, subject, and any additional message
- The reviewer will visit this URL to review and approve/reject the content
Scenario 2: Handle reviewed content
Section titled “Scenario 2: Handle reviewed content”This second scenario will be triggered when a human completes their review, and will handle the approved content.
Scenario 2 Overview
Section titled “Scenario 2 Overview”Here’s what the complete second scenario looks like:
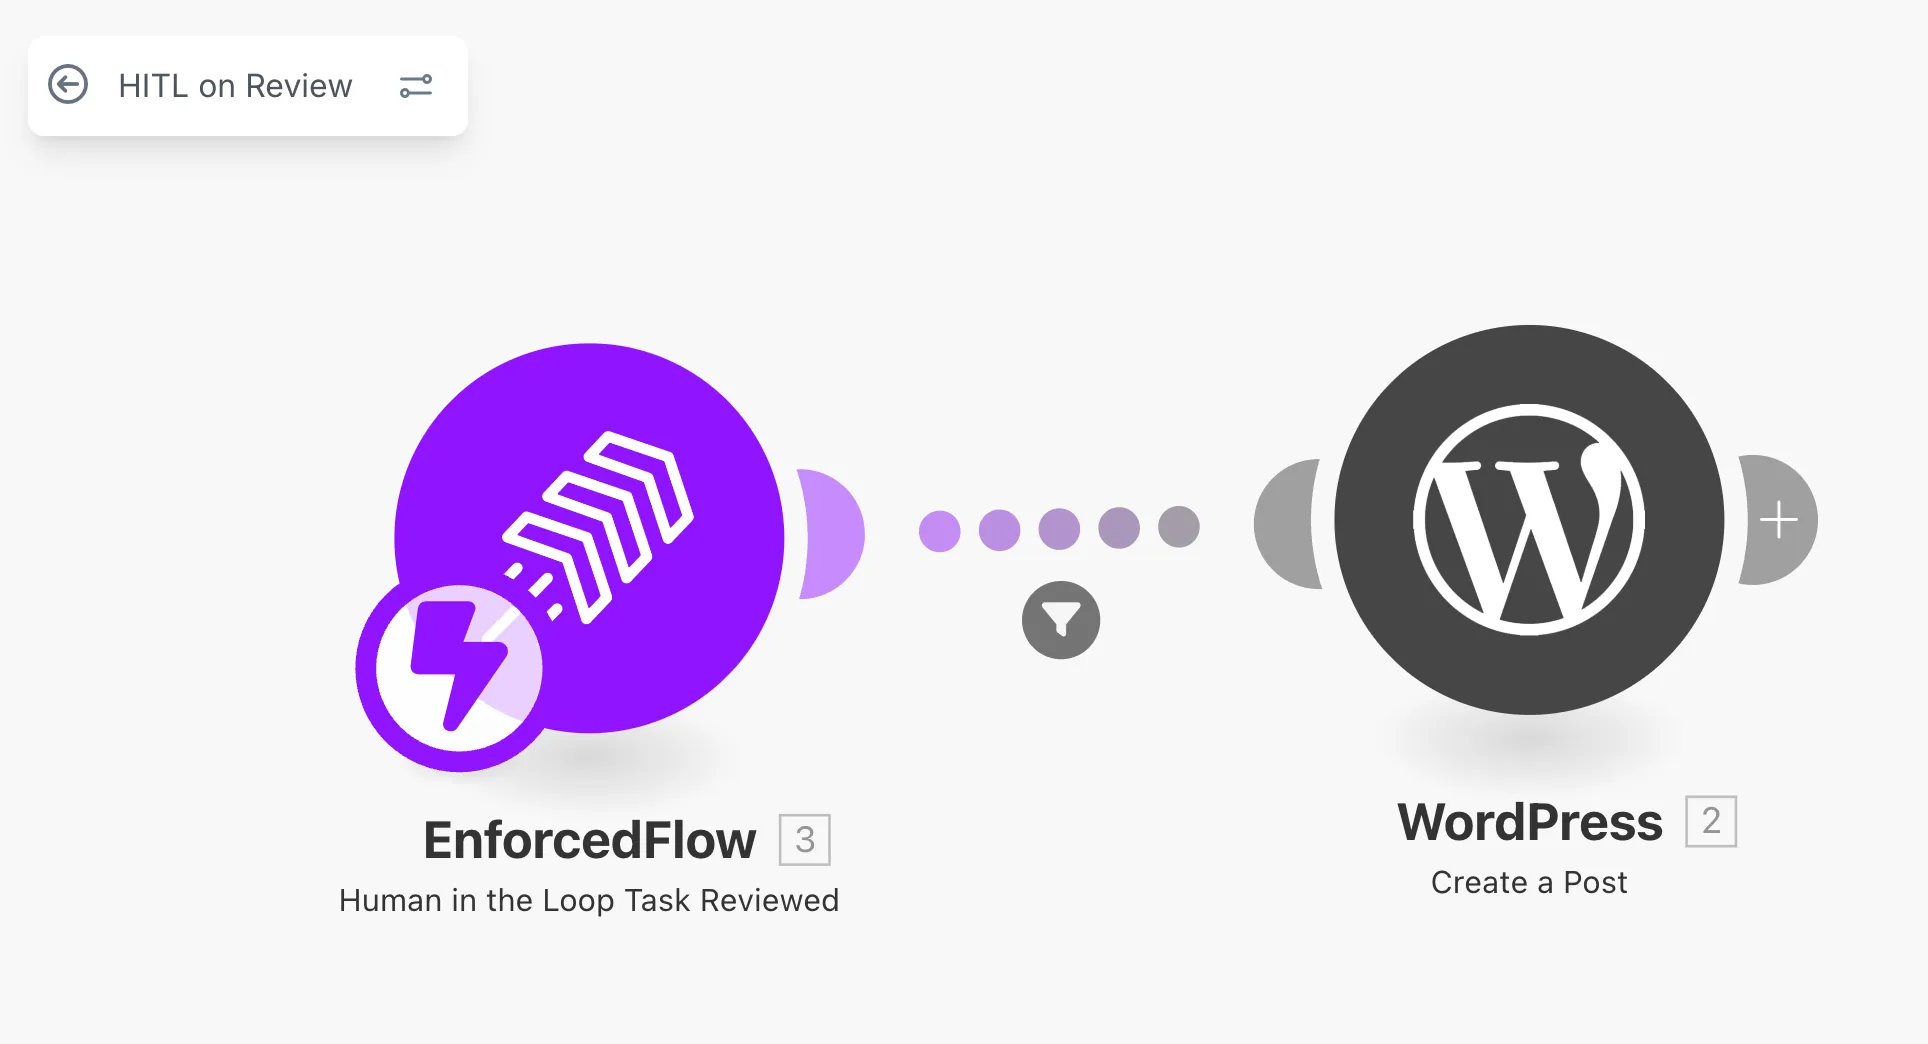
- EnforcedFlow webhook triggers when a review is completed
- Filter checks if the review was approved
- WordPress creates a post with the approved content (only if approved)
Step 1: Add the “Human in Loop Task Reviewed” trigger
Section titled “Step 1: Add the “Human in Loop Task Reviewed” trigger”Create a new scenario and add the EnforcedFlow trigger module.
Select Human in Loop Task Reviewed as the trigger event.
- Choose a webhook: Click Add to create a new webhook, or select an existing one
- Group Name (Optional): If you specified a group name in Scenario 1, enter the same group name here to only receive events from that specific group
The webhook will receive data whenever someone completes a review.

What data does the trigger receive?
When a review is completed, the trigger receives:
- ID: Task identifier (used by EnforcedFlow)
- Title: The title used to create the task
- Original Content: The content used in task creation
- Approved Content: The content after review (if unchanged, same as original)
- Review Outcome: Either “approved” or “rejected”
- Metadata: Any metadata key-value pairs you passed in Scenario 1
- Group Name: The group name if specified
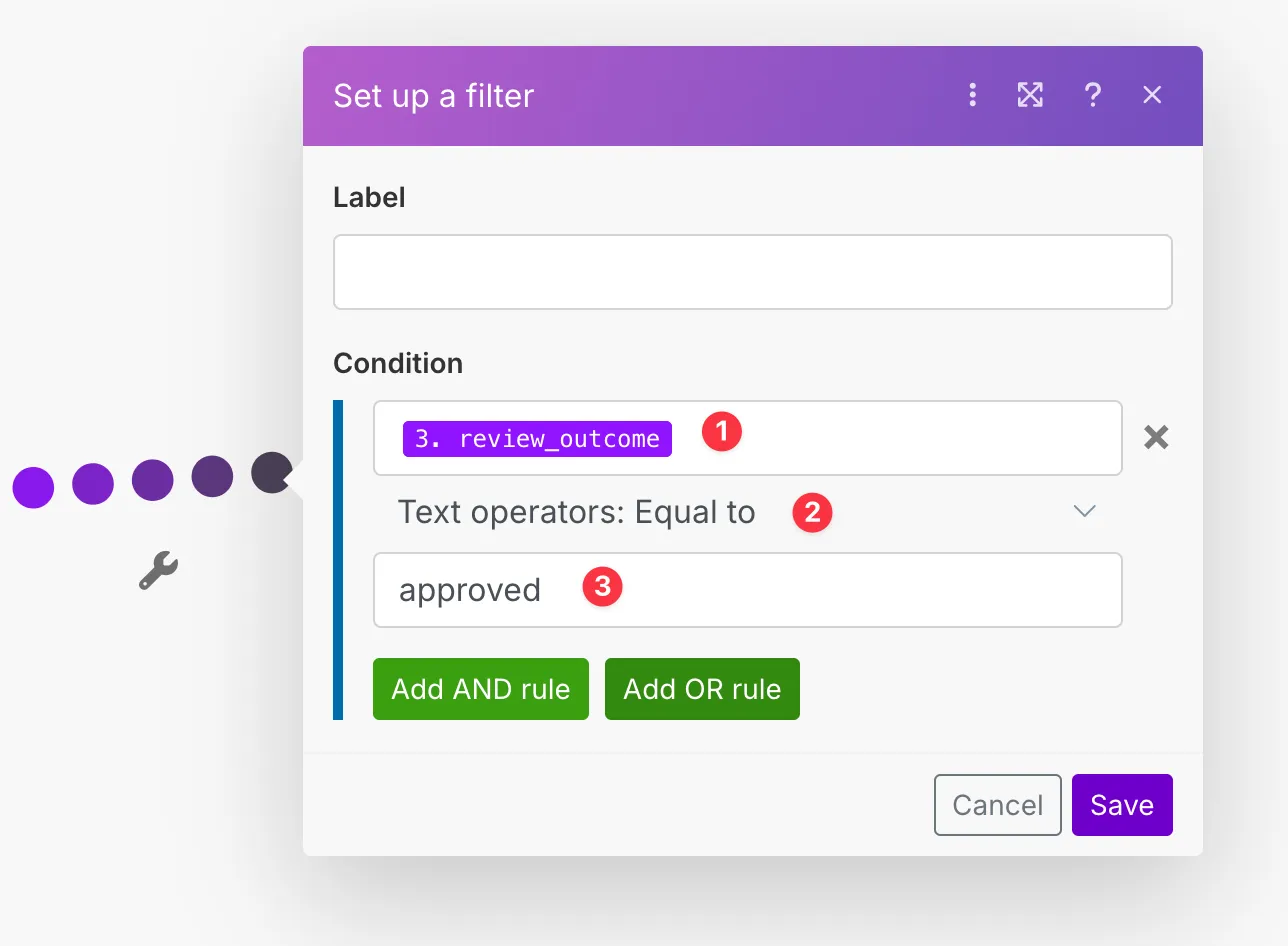
Step 2: Filter for approved reviews
Section titled “Step 2: Filter for approved reviews”Add a filter to ensure only approved reviews are processed.
Set the condition to check if review_outcome equals approved.
You can create a separate scenario to handle rejected reviews if needed.
Step 3: Take action with approved content
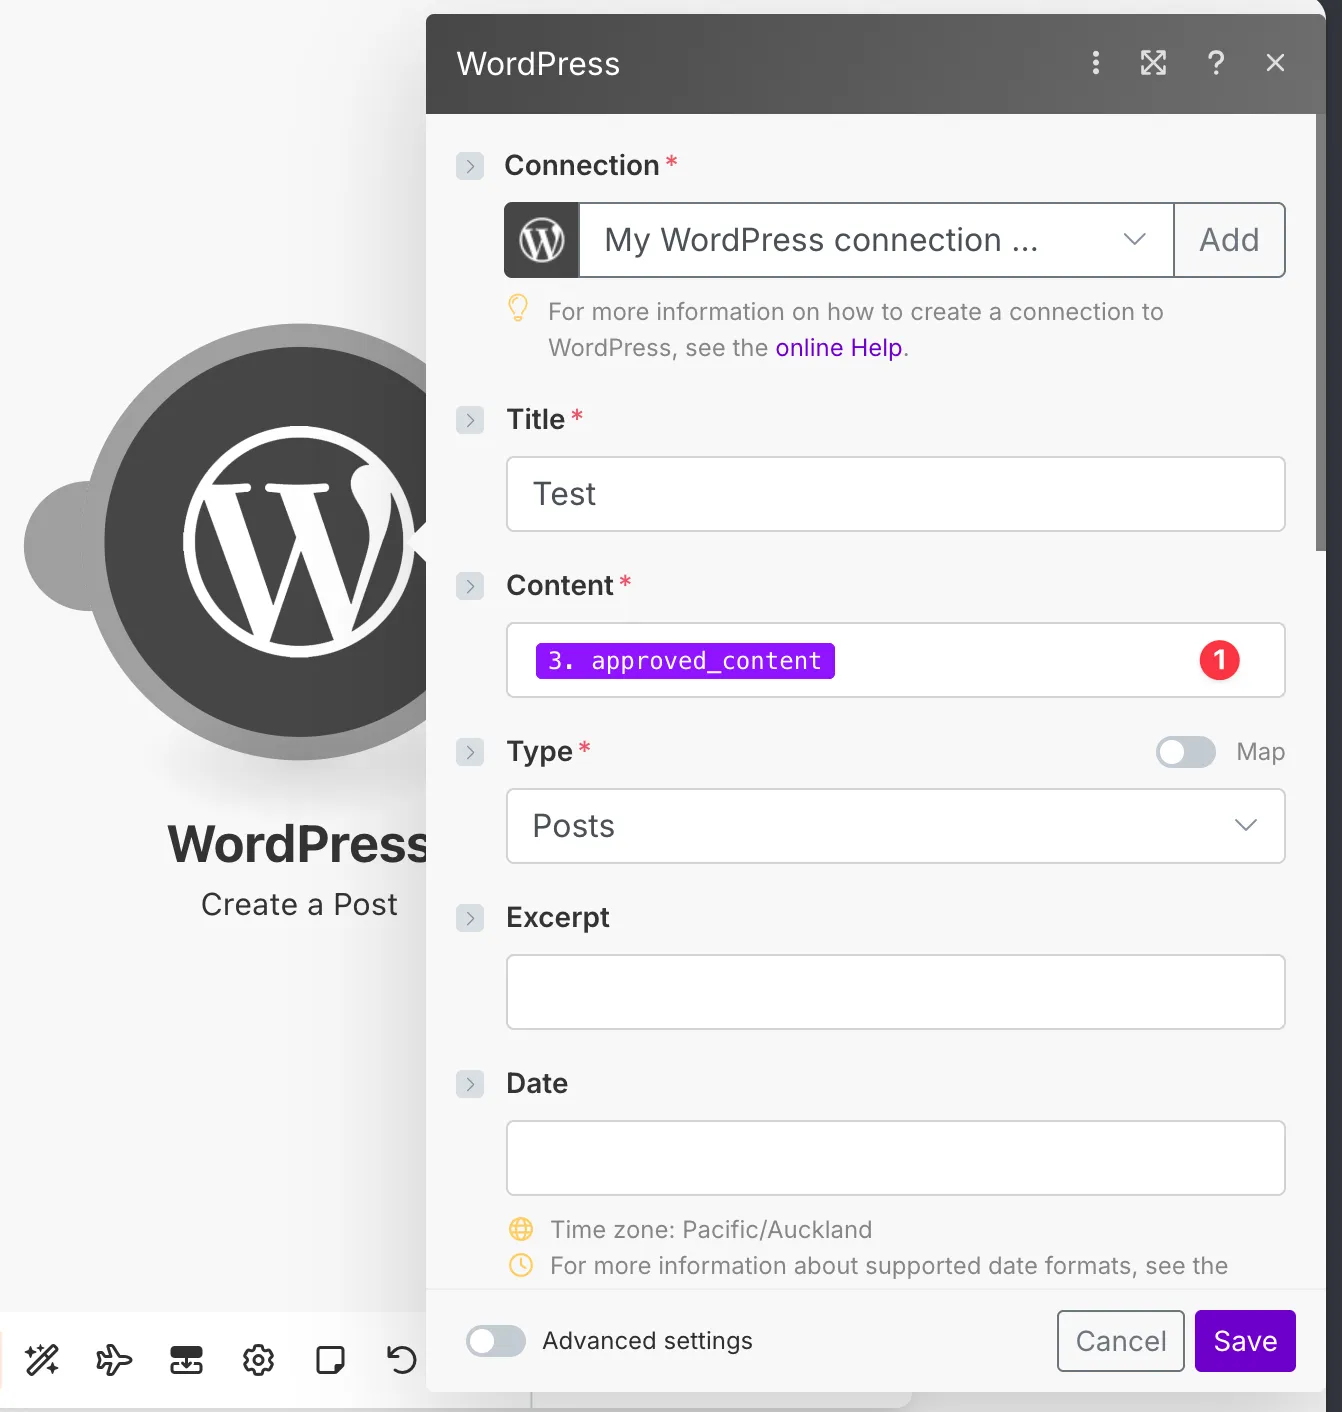
Section titled “Step 3: Take action with approved content”Add the module for your desired action. In this example, we’re publishing approved content to WordPress.
Map the approved_content field from the trigger to your action module. This ensures you’re using the content after the human has reviewed and potentially edited it.
You can use any action here - send emails, update databases, post to social media, create support tickets, etc.
Summary
Section titled “Summary”You now have a complete human-in-the-loop workflow in Make:
- Scenario 1 generates AI content and sends it for human review
- Scenario 2 receives the reviewed content and takes action based on approval status
This pattern ensures that AI-generated content is always reviewed by a human before being published or sent to customers, maintaining quality and accountability in your automated workflows.